

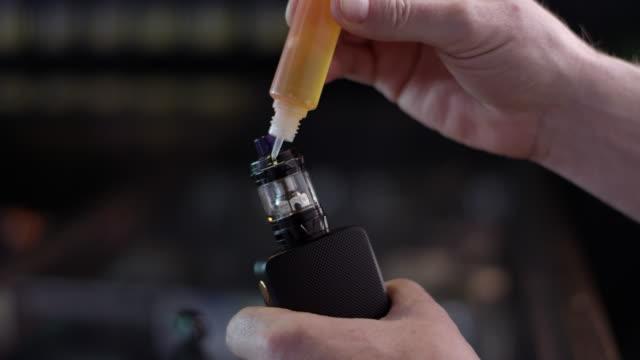
You have a mod, charged batteries and a bottle of e-liquid, and the remaining question is how the liquid gets into the tank. It looks fiddly the first time, yet it is straightforward once you recognise which kind of tank you own. This guide walks through the whole setup, beginning with the device itself. The steps are the ones this writer has relied on for several years without trouble; other vapers have their own variations.
Get the mod ready
Batteries usually arrive from the manufacturer fully drained, so charge them before first use. When you insert them, check the polarity closely. Batteries put in the wrong way round are dangerous and can smoke or, in some cases, explode. On many Smok mods the positive end is marked with a red plus sign (+) and the negative end with a blue minus sign (-).
With the batteries seated, switch the mod on. It may ask whether a new coil is fitted: answer yes for one you have never used and no for one already in service. The coil’s ohm rating is printed on its packaging and on the coil. Confirm the mod shows the same figure before you go further.
Identify your tank and its fill point
Tanks fill in a few different ways:
- Older designs: the top cap unscrews and you pour liquid in around the chimney.
- Top fill port: later tanks put a port in the top cap, which you reach by pushing or swivelling the cap aside. O-rings around the port usually make the seal airtight.
- O-ring under the cap: other current tanks seat an o-ring just beneath the top cap, which makes filling easier still.
Whichever you have, do not confuse the chimney with the fill port. The chimney is the open hole in the middle through which air travels. A small splash of juice in there does no harm. If you fill it by accident, though, take out the coil and rinse the whole tank, or you will end up with sticky liquid over both tank and mod.
Prime the coil before filling
Prepping a new coil ahead of the first puff is long-standing practice, and people do it in many ways, some of them a little odd. The most common is to drip a small amount of your chosen juice onto the wicking ports, meaning the exposed cotton on the coil’s side, and onto the cotton circles visible at the top. Depending on the coil there are 1, 2, 4, 6 or 8 of those circles.
After the liquid has soaked in, screw the coil into the tank’s base or top. Certain newer tanks, Smok’s V2 and TFV16 among them, need only a push: the coil clicks into the base and suction pressure keeps it steady. Then fill the tank to the top.
Should you “break in” the coil?
One much-debated trick is to close the air vents and draw on the tank without pressing the fire button, pulling extra juice into the coil. This writer did that for a while and found little difference. The approach used now is simpler:
- Leave the filled tank alone for about 5-10 minutes while the cotton saturates naturally.
- Set the mod to around half the recommended wattage for the first few puffs.
- Raise the power by 7-10 watts per hit until you arrive at the setting you like.
Easing in this way, rather than jumping from 0-150W, breaks the coil in gradually and lets you taste the flavor at each step to find the wattage that suits it.
Switching flavors and cleaning the tank
New vapers tend to change flavors often while working out what they like. An RDA is one way to sample juices without refilling a tank over and over. If you would rather keep using your sub-ohm tank, remove the coil and rinse the tank between flavors so the two liquids do not mix into something strange.
Sanitizing the tank every couple of fills is also worthwhile, because dust and dirt settle in the chimney and in the tank’s crevices. Fill a cup or container with very hot water, let the tank soak for half an hour or longer, rinse it, and let it dry before the next fill.
Choosing a flavor
E-liquid comes in a wide range of styles, including fruit, dessert, breakfast, tobacco and menthol. Flavor reviews of individual brands appear on this blog from time to time.