Vape Hardware 101: Guide to Vape Coil Builds for Newbies
When you get a little more familiar with your eCig, you'll realize there are a lot of tweaks you can make to improve your vaping experience.
Modifying your eCig helps you get a cleaner flavor, improves your cloud, and gives you better purity. But one of the best and most common modifications is building your own DIY vape coil.
To learn more about vape coil builds (and why you might want to DIY your own), keep reading below.
Why Learn About Vape Coil Builds?
Why would you want to build your own coils? People do it for a range of reasons including:
- Longer lasting coils (fewer problems with burn-out ).
- DIY coils are the best coils for flavor
- Saving money
Before you get started, you'll need to put together a vape coil building kit. This should include the following items:
- An ohmmeter
- A Re-buildable Atomiser (RBA)
- Resistance Wire (There are a few brands available)
- Screwdriver and/or Allen Keys that fit your RBA
- Butane Torch (ideally) or a lighter
- Wire cutters
- Wicking Material
- Scissors
- eJuice
When you've assembled your coil building kit, you'll need to find some time to sit and have a go at making your first DIY vape coil.
Making Your Own Coil
Follow these steps and you'll soon be installing your first hand-made coil.
1. Resistance
The most important safety aspect when you build your own vape mod is the ohms that the coil can transmit. Consult your manual to make sure you know how many ohms the coil will need to deal with.
From there, you can calculate how many coils you need. Use this calculator from steam-engine.org to get it right. You will need to check and recheck your coil several times to be safe, including after coiling and again after adding wick and eJuice.
2. Making the Coil
You'll be able to use less wire as you get more experienced, but for your first coil, cut a length of about 15cm. Hold one end in a pair of tweezers and use your torch or lighter to heat the end of the wire until it glows orange.
Move the heat up and down the wire until it has all been heated to orange a few times. Then leave it to cool, just for a little while. Oxidising the wire like this makes it easier to work with.
Now use a small screwdriver (around 3mm in diameter) and wrap your wire around it as many times as you calculated. Keep the coils close to each other, but not overlapping. Check the ohmage. If it's correct, move on.
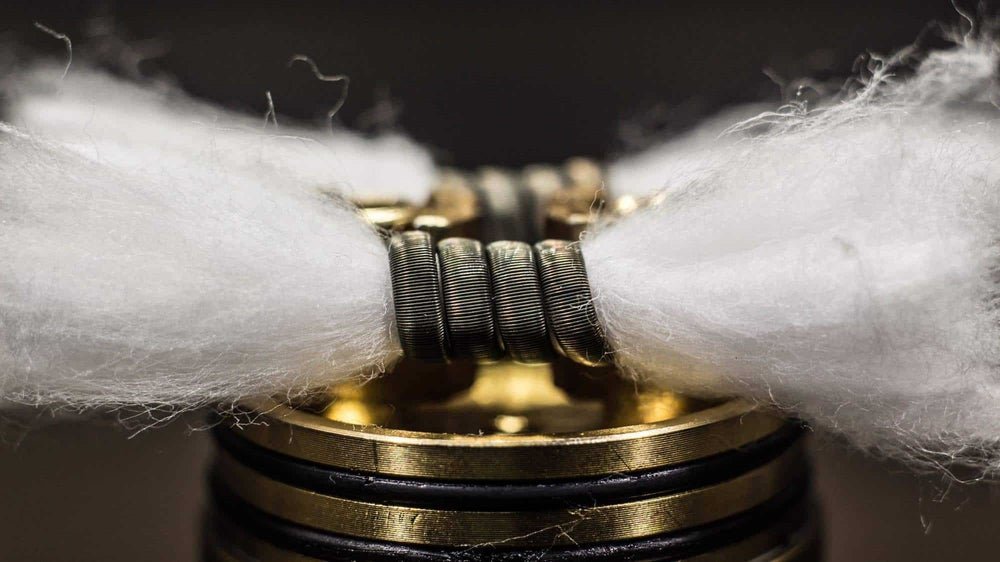
3. Install the coil
Now it's time to install the coil into your RBA. Check the instructions, and trim the ends of the coil to fit. It's best if you don't entirely remove the screws to the post hole as they are small and easily lost. Instead, just loosen them.
Once the coil is installed, add the wick and trim to size, add a little eJuice to each end and recheck with the ohmsmeter. If your coil isn't right, stop and start again from the beginning.
Vape Away
Now you've installed your own coil, it's time to saturate the wick with juice and enjoy the crisp, clean taste of your first hand-made coil! But if doing your own vape coil builds sounds like too much effort, don't forget that we carry a range of replacement coils in our store!